FAMA BUYER’S GUIDE TC044 Warning Lights
Prepared by the FAMA Electrical Subcommittee
This guide does not endorse any manufacturer or product

Contents
Introduction
There are many choices to be made for Fire Truck Warning Lights when purchasing your new apparatus. The goal of this buyer’s guide is to help with those choices and make that decision-making process much easier.
Overview
When considering Warning Lights for your new apparatus there are several factors to take into consideration. It is important for you or your committee to completely understand what guidelines have to be met for your new apparatus to be NFPA compliant. The following sections will touch on all those factors that need to be considered for Fire Truck Emergency Lights along with some application photos that can be beneficial when it comes to specifying your new apparatus. We will look at this in detail as we move forward.
Apparatus
The first determination for you or your committee will be the size of your apparatus. NFPA breaks this into two categories, Large Apparatus & Small Apparatus. Let’s take a look at the Large Apparatus first.
LARGE APPARATUS
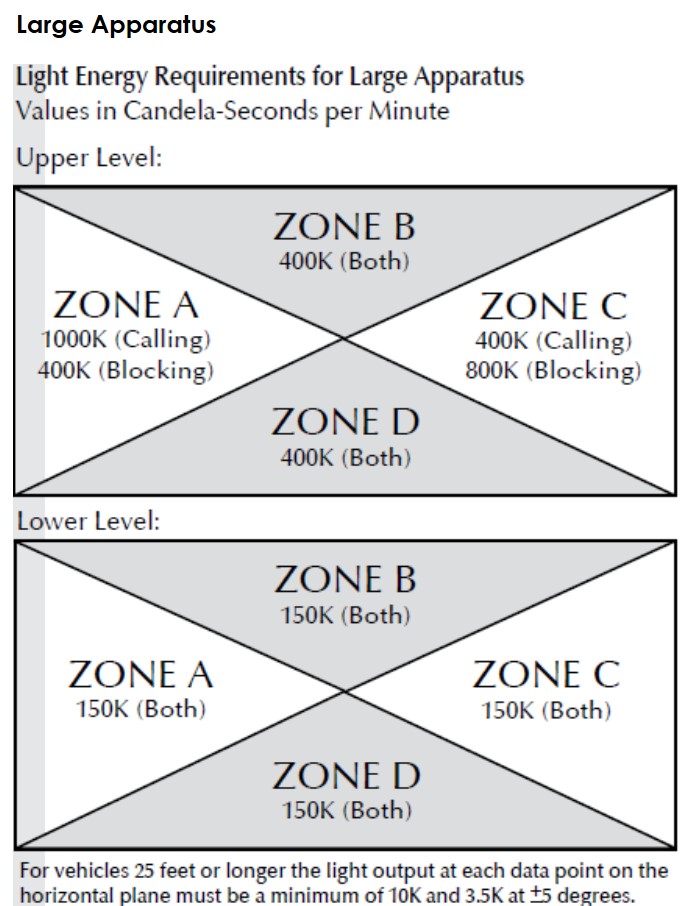
A large apparatus is defined in NFPA 1901 as an apparatus with a bumper-to-bumper length of 25 feet or more. The upper-level optical warning devices shall be mounted as high and near the corner points of the apparatus as is practical. The lower-level devices shall be between 18 inches and 62 inches above level ground. (we will touch on the zone configurations along with upper/lower level in the next section). A mid-ship optical warning device shall be used if the distance between the front and rear lower-level optical devices exceeds 25 feet.
The minimum optical warning system should require no more than an average of 40 amps when operating in the blocking mode (we will cover modes later in this section). Should the apparatus require mid-ship lights, no more than 5 amps of additional current should be required for operation of each set of mid-ship lights. See the NFPA 1901 standards guide for more information and load management demand questions.
More mid-ship lights needed:
- Additional mid-ship lights must be added to lower B & D zones on a large apparatus so that you always maintain a horizontal distance of 25 feet or less between all centers of the lower level warning lights. Below is a minimum mid-ship lighting example for Zones B & D.
SMALL APPARATUS
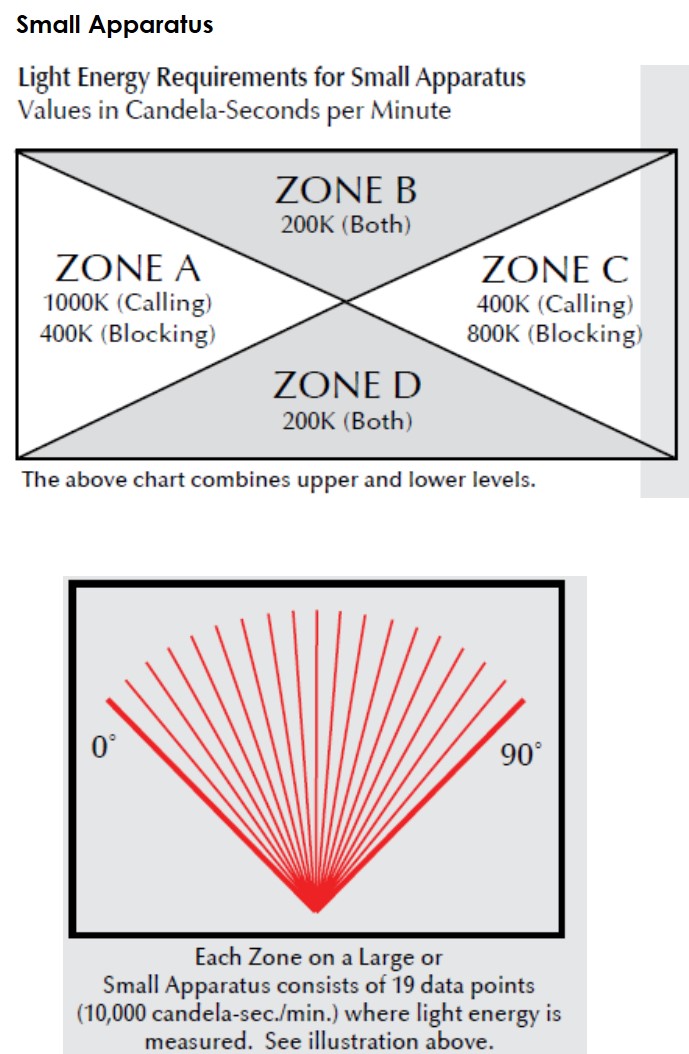
A Small Apparatus is defined in NFPA 1901 as an apparatus whose bumper-to-bumper length is less than 25 feet. The upper-level warning devices should be mounted high, but not over 8 feet, at the optical center. One or more lower-level warning devices shall be mounted close to the front corner(s) of the apparatus with the distance between 18 inches and 48 inches from the ground.
The minimum optical warning system should require no more than an average of 35 amps when operating in the blocking mode. See the NFPA 1901 standards guide for more information on load management demand questions.
FLASH RATE & FAILURE MINIMUMS
It is important to take into account your Flash Rate & Failure minimums for each size apparatus. For Large & Small Apparatus the Flash Rate & Failure minimums are as follows:
- 75 flashes per minute is the minimum flash rate allowed for a single optical source
- 150 flashes per minute from all the light sources visible at any data point (i.e. two warning lights are required per zone). Failure of a lighting product should not leave a zone area without a lighting source.
OPERATION MODES
There are two operation modes when running your apparatus, they are:
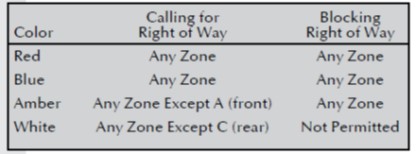
- Calling for Right of Way (Responding) – apparatus responding to an emergency
- Blocking Right of Way (At Scene) – Blocking right of way, white light not permitted
PERMISSIBLE COLORS
There are permissible Warning Light colors in both Calling for Right of Way & Blocking Right of Way that have to be taken into account when considering your Warning Light selection. The following table lists the permissible colors in both Modes:
LIGHT ENERGY REQUIREMENTS
There are minimum Light Energy Requirements that have to be met for both Large & Small Apparatus. The following tables show those levels so the correct Warning Light Package can be determined:
Large Apparatus
Small Apparatus
Zones
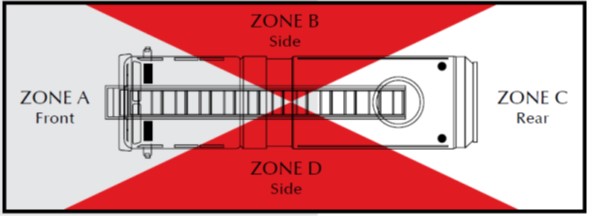
There are four zones that you have to take into consideration when specifying your apparatus. These consist of Zones A, B, C, & D. It is also important to remember that each zone is broken into an Upper and Lower level as well. So, in total, there are eight zones that have to be addressed. The following diagram shows an overview of each main Zone on an apparatus:
ZONE A
Per the above diagram, Zone A is going to be the forward facing direction on your apparatus.
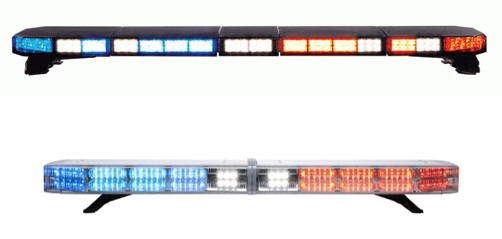
The Upper portion of Zone A usually consists of some form of light bar. Here are a couple examples of light bars in Upper Zone A on apparatus:
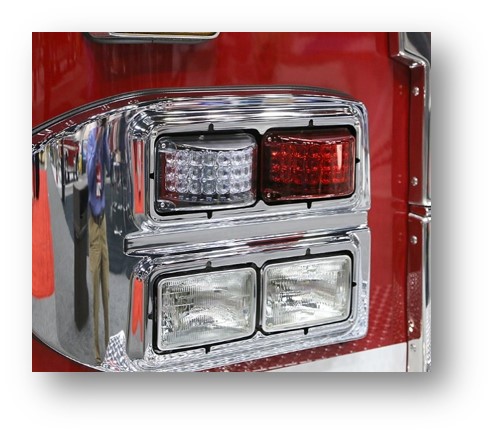
Lower Zone A usually will consist of 2-4 Perimeter Lights or Directional Lights.
ZONE C
Again, referring back to the diagram, Zone C is going to be your rear facing direction on your apparatus.
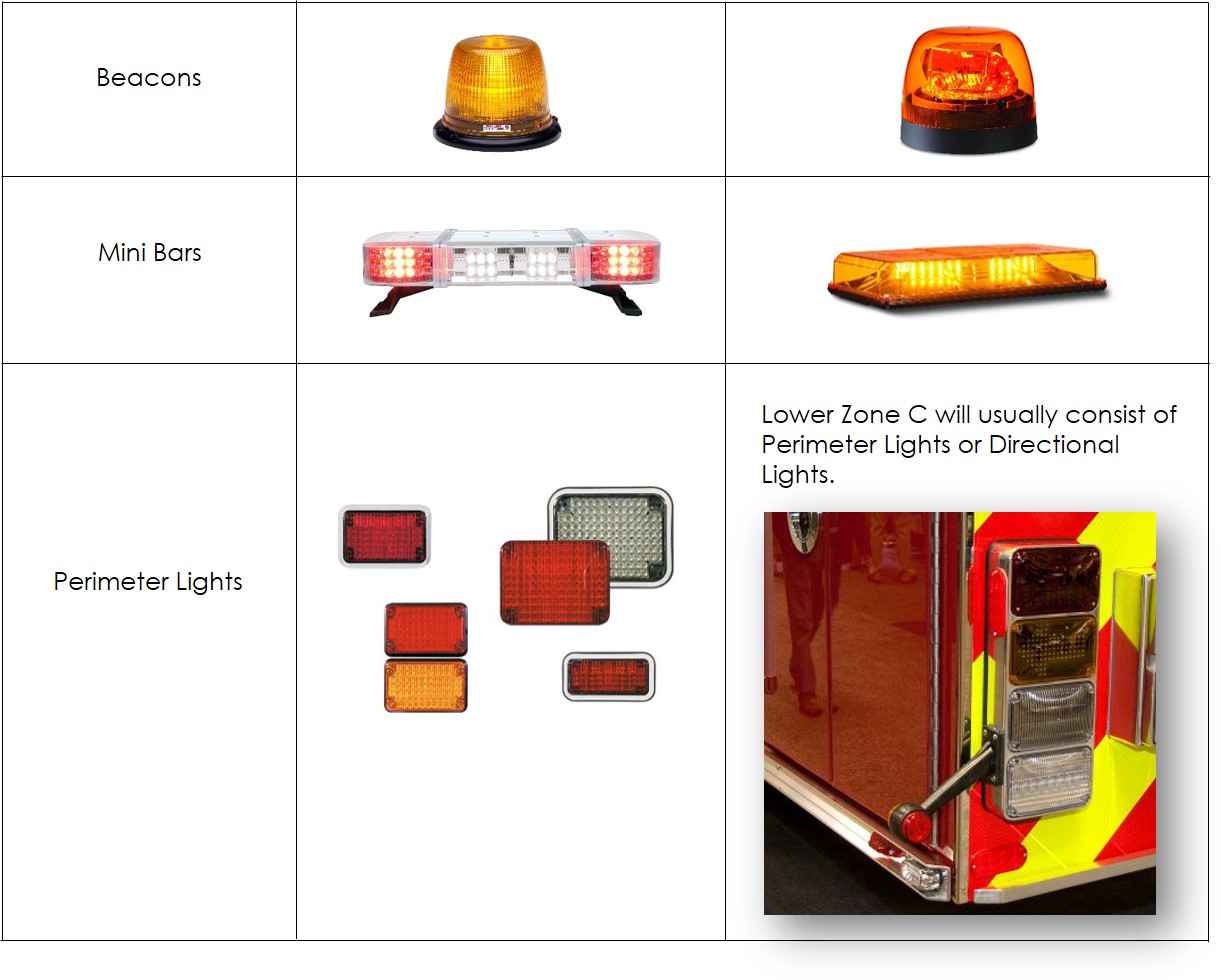
Upper Zone C can consist of many different light configurations to be compliant per NFPA standards. Some of your most popular options for Upper Zone C are going to be Beacons, Mini Bars, & Perimeter Lights. Pictured are examples of each:
ZONES B&D
One last time referring back to the diagram, Zones B & D are going to be the sides of your apparatus. With Zones B & D, their lighting packages will almost always mirror one another.
When it comes to Upper Zones B & D, it is usually standard to place Perimeter Lights in this area to obtain a compliant lighting package. Depending on what brand lights are installed, where they are installed, & what size lights will determine how many lights are needed. Your apparatus manufacturer will determine how many lights are needed to be NFPA compliant. Here are some examples of Perimeter Lights:

Perimeter or Directional Lights
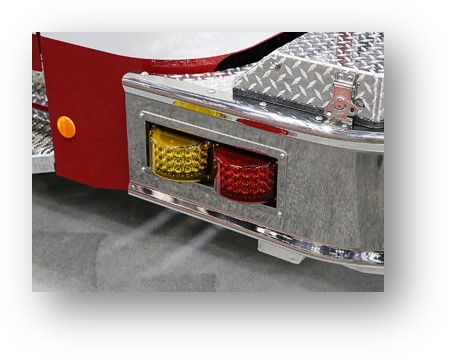
Lower Zones B & D will also usually entail some form of Perimeter or Directional Lights. Here are some examples:
NFPA Compliance
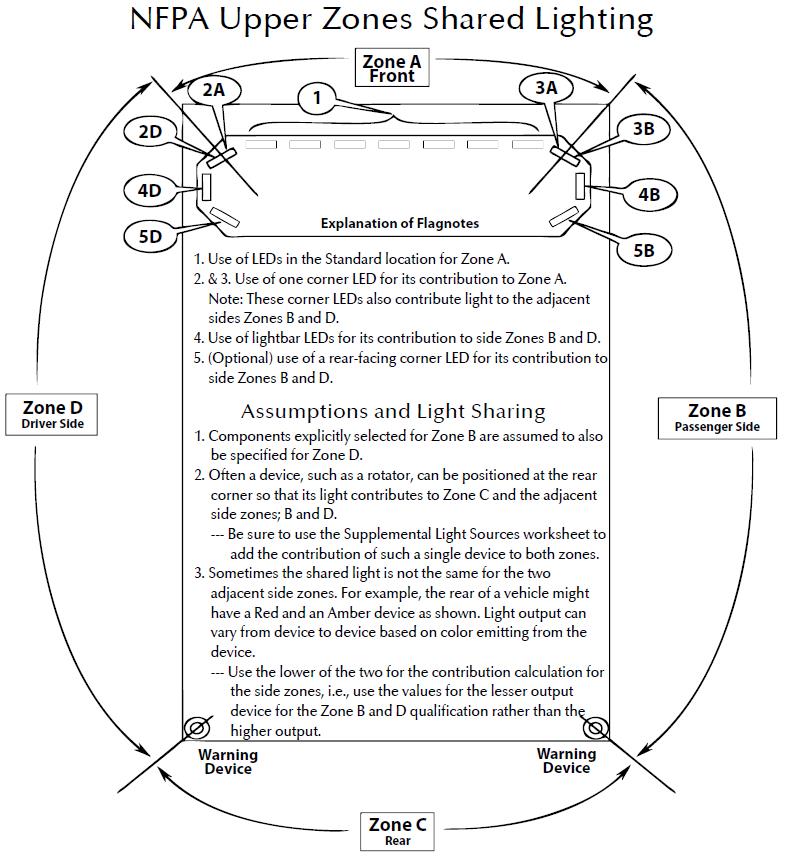
Finally, in some instances, lights from one zone will also cover another zone for NFPA compliance. In the following diagram we will take a look at how that can happen:
Conclusion
As you can see, there are many determining factors that go into the decision making process for the selection of a Warning Light Package. Use of this guide will help make that task much less daunting. Make sure you use the expertise of the Warning Light Manufacturer along with the OEM who builds your apparatus to help with any questions you may have along the way. Both of these outlets can be very beneficial to you as you move forward.

